Appearance
QGIS Project Preparation
Project preparation is done in QGIS. For more information about loading layers, styling the data and creating map themes, visit QGIS documentation page.
In addition, Mergin Maps mobile app uses some of the features within the project to help visualise, capture and browse the data. Here is an overview of the project preparations steps.
TIP
Our tutorials can guide you through QGIS project preparation step by step.
In Creating a Project in QGIS you will learn how to create a project, add new layers and configure a basic form.
Further Project Customisation will show you how to style layers, add labels, customise the preview panel, define map themes and set up the project extent.
Survey layers
Vector layers can be used as survey layers in your Mergin Maps project. You can apply styles and set up the forms to make your field survey easier. The same applies for non-spatial layers that can be used on their own to add new data or linked to a spatial layer, e.g. when linking multiple photos or records. They can be also used in value relation widgets.
Making changes in the data schema of layers can lead to issues in the synchronisation process. Be careful to deploy the revised project properly. Design the data schema carefully when creating a layer to avoid the need to change it later.
Here are some practical tips for creating and maintaining layers in your project:
- Always use GeoPackage for layers. If you use other formats, such as ESRI shapefile, it is not possible to detect changes from other users and they may be overwritten. Overwritten files are stored in a conflict file. This applies to both spatial and non-spatial layers.
- Add some extra back-up field attributes when creating a survey layer with different types (e.g. a couple of texts, int, real, date/time) and hide them in the form design. These can serve as a backup: if you need extra fields later in the survey, just alias these extra fields and add them to form.
- If you do not need a field, remove it from the form. You don't need to delete it from the table.
- Instead of renaming a field, change its alias.
- Add new layers to your project as separate GeoPackages. Do not add a new table to your existing GeoPackage that contains a survey layer. Just to be safe, it is better to have one GeoPackage for each of your survey layers.
- use GeoTIFF format for your raster files or store them in a separate GeoPackage database
Layer symbology
The same symbology as defined in the QGIS project will be used in Mergin Maps mobile app. However, Mergin Maps mobile app does not include all the SVG markers that are available within QGIS. Therefore, if you are using SVG markers for your layer styling, ensure those are copied to the project folder.
Forms
During the field survey, it is often necessary to fill out some attributes in the form to record the properties of surveyed features. Forms can make the survey easier, consistent and more effective.
Detailed description of form widgets and form configuration can be found in the Configure Form section.
Settings for Mergin Maps mobile app preview panel
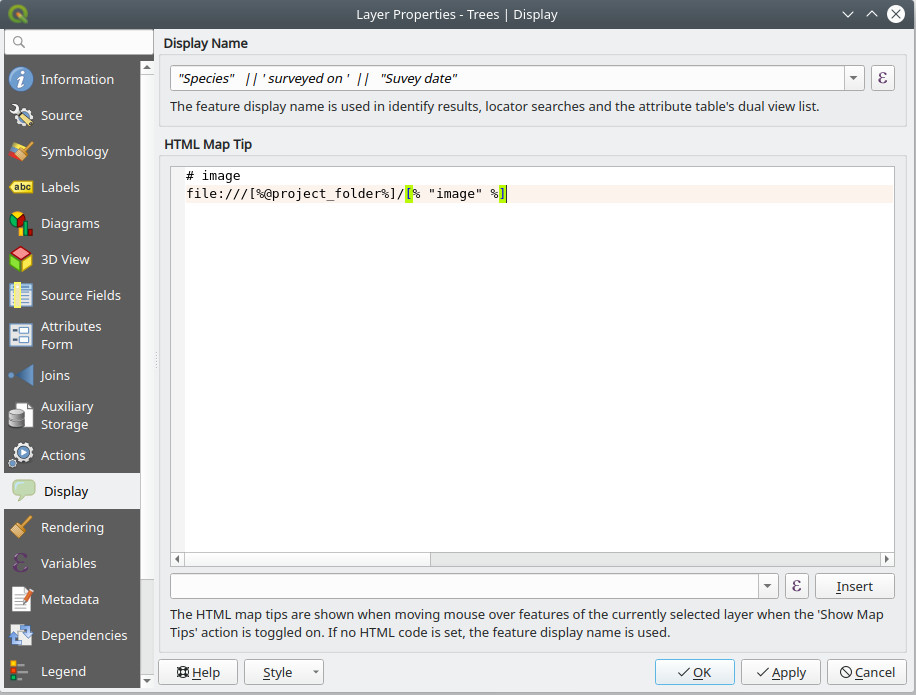
What appears in the Mergin Maps mobile app preview panel can be defined in the Display tab in Layer Properties:
- Display Name: a field name or an expression.
- HTML Map Tip: the content of the preview panel. While QGIS always interprets the content of map tip as being HTML, Mergin Maps mobile app extends the syntax to allow two more modes: field values and images. If the map tip is not specified, Mergin Maps mobile app will try to use the first three fields and show their attribute values.
HTML
Sample map tip content that will show render as HTML page:
<p><strong>Notes:</strong>[% "notes" %]</p>If the map tip does not contain any special marker, it is assumed that the map tip is HTML content. Only a limited subset of HTML is supported - see Qt documentation
Field values
Sample map tip content that will show "description" and "time" field values:
# fields
description
time
If the map tip content has # fields marker on the first line, the following lines will be understood as field names that should be listed in the preview. At most three fields will be shown. Expressions are not allowed.
Image
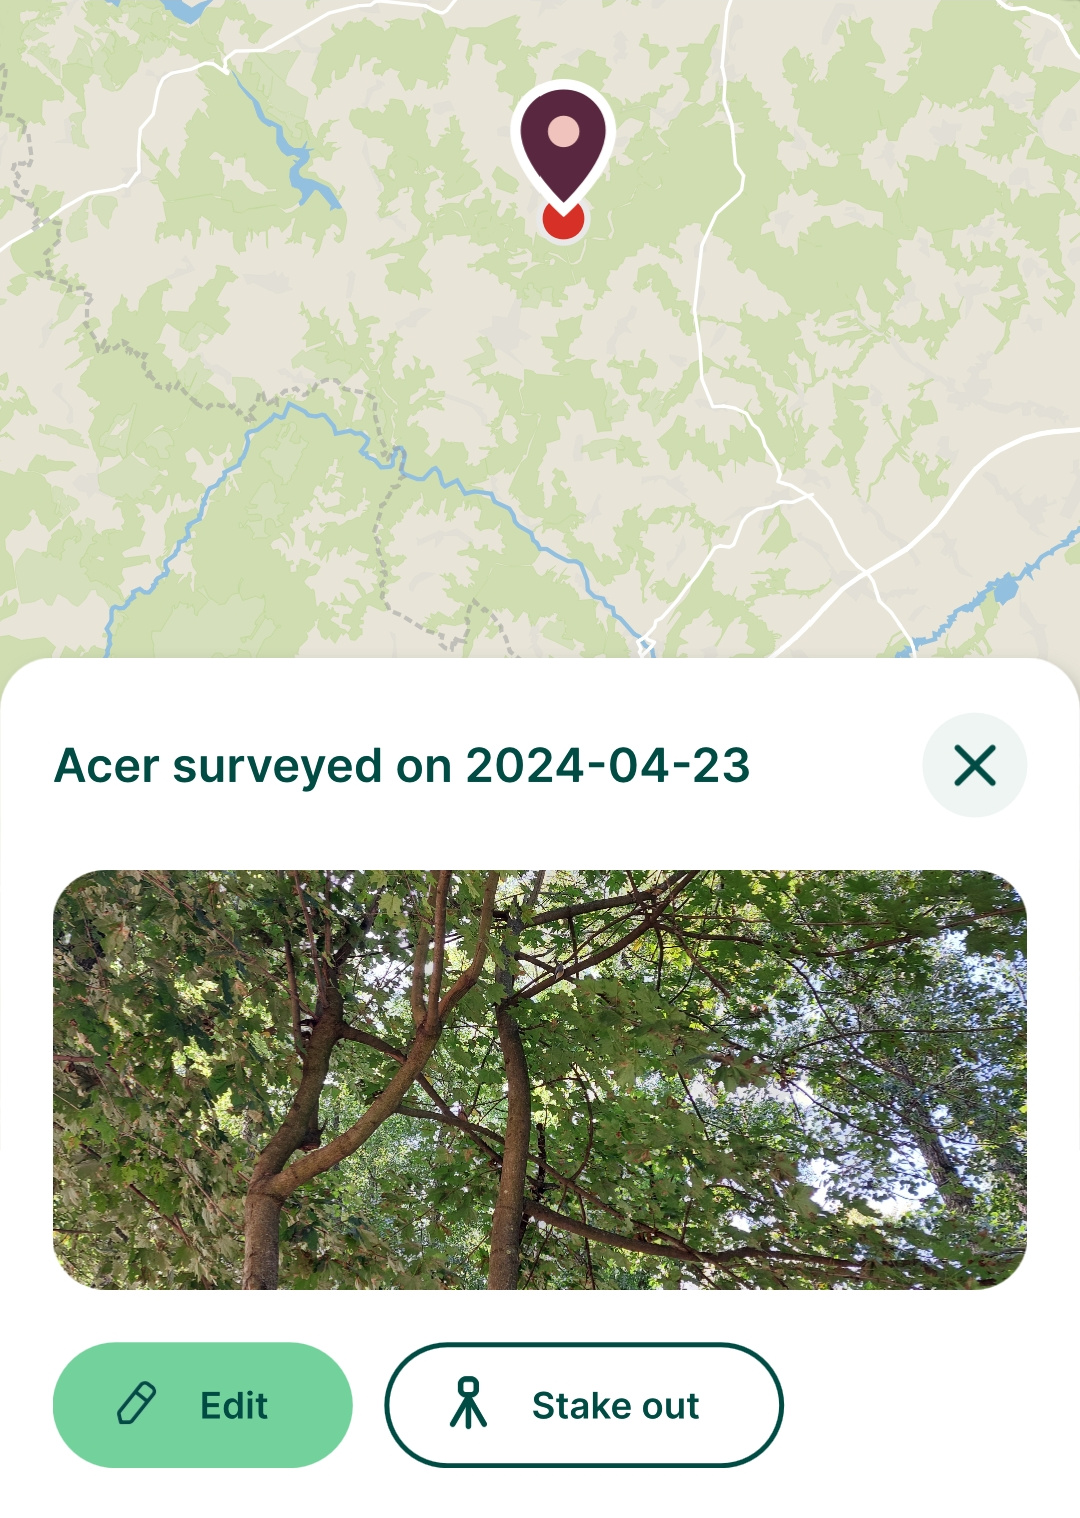
Sample map tip content that will cause an image to be show specified by file path in field "image_1" (containing path relative to the project folder):
# image
file:///[%@project_folder%]/[% "image_1" %]
If the map tip has # image marker on the first line, the following line is understood as the URL for the image. It can be a regular file on the file system, but it could be even a remote image from the network. Expressions embedded in the image URL will be evaluated (enclosed in [% 1+1 %]).
Background layers
Various online and offline maps can be used as background layers for navigation during the field survey. You can find more information in Background Maps.
Project settings
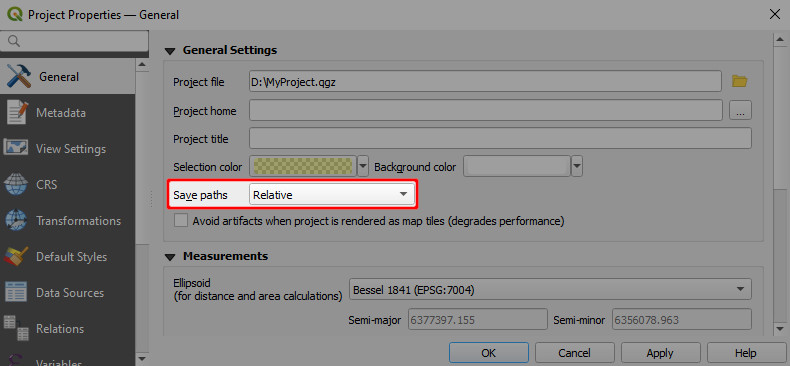
- Ensure the paths are set to Relative in the General tab in Project Properties. All paths to the project data in Mergin Maps mobile app are relative to the project location.
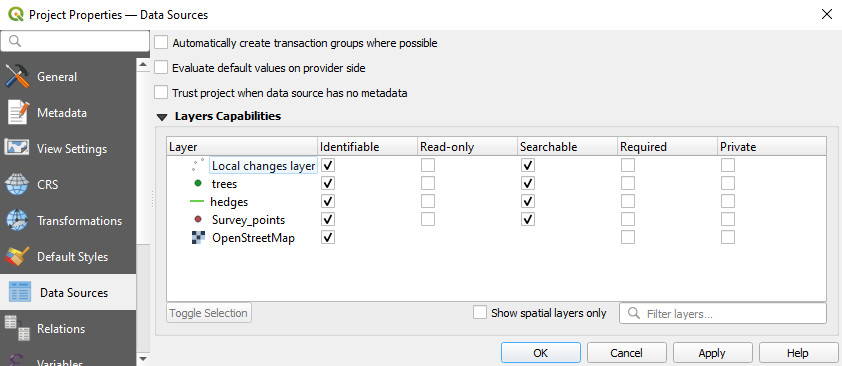
- Define the
layers capabilities in the Data Sources in Project Properties.
- Identifiable layers can be queried in Mergin Maps mobile app. If you want to be able to search for attribute values in a layer, it needs to be identifiable and searchable.
- read-only layers cannot be modified. If a vector layer is not intended to be used as a survey layer, set it as read-only.
- non-spatial layers need to be set as searchable to enable browsing, searching, or editing.
Project extent
In Mergin Maps mobile app, there is an option to zoom to the project extent.
If the project extent is not set, Mergin Maps mobile app zooms to all visible layers. This is not particularly convenient when you have a layer with a large/global extent (e.g. Open Street Map). Instead, you may want to set the project extent to the area of your interest.
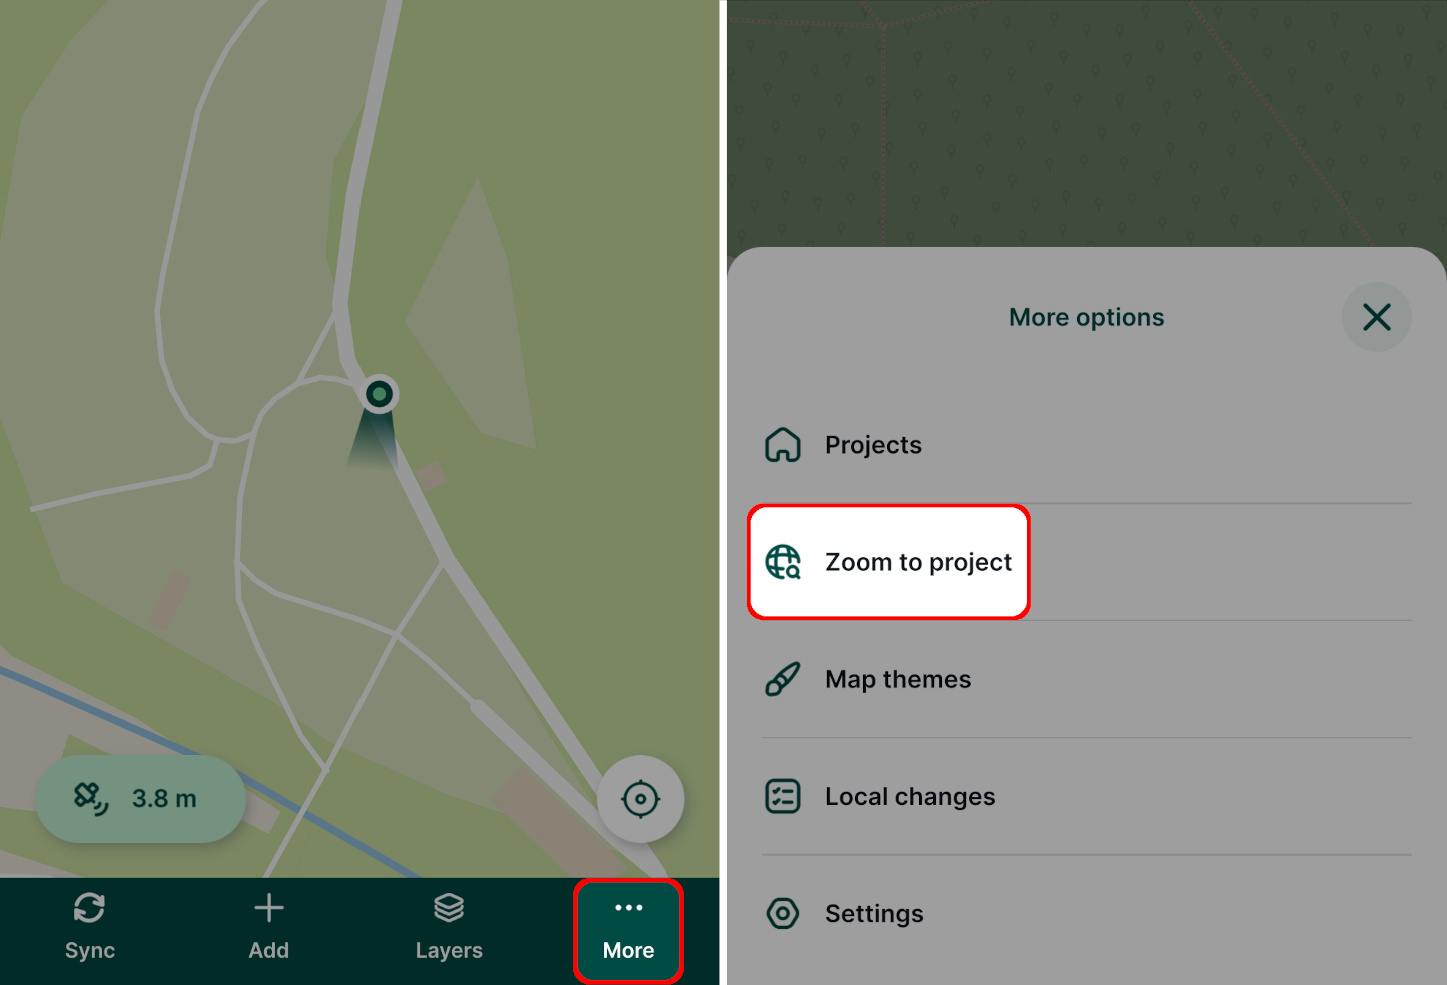
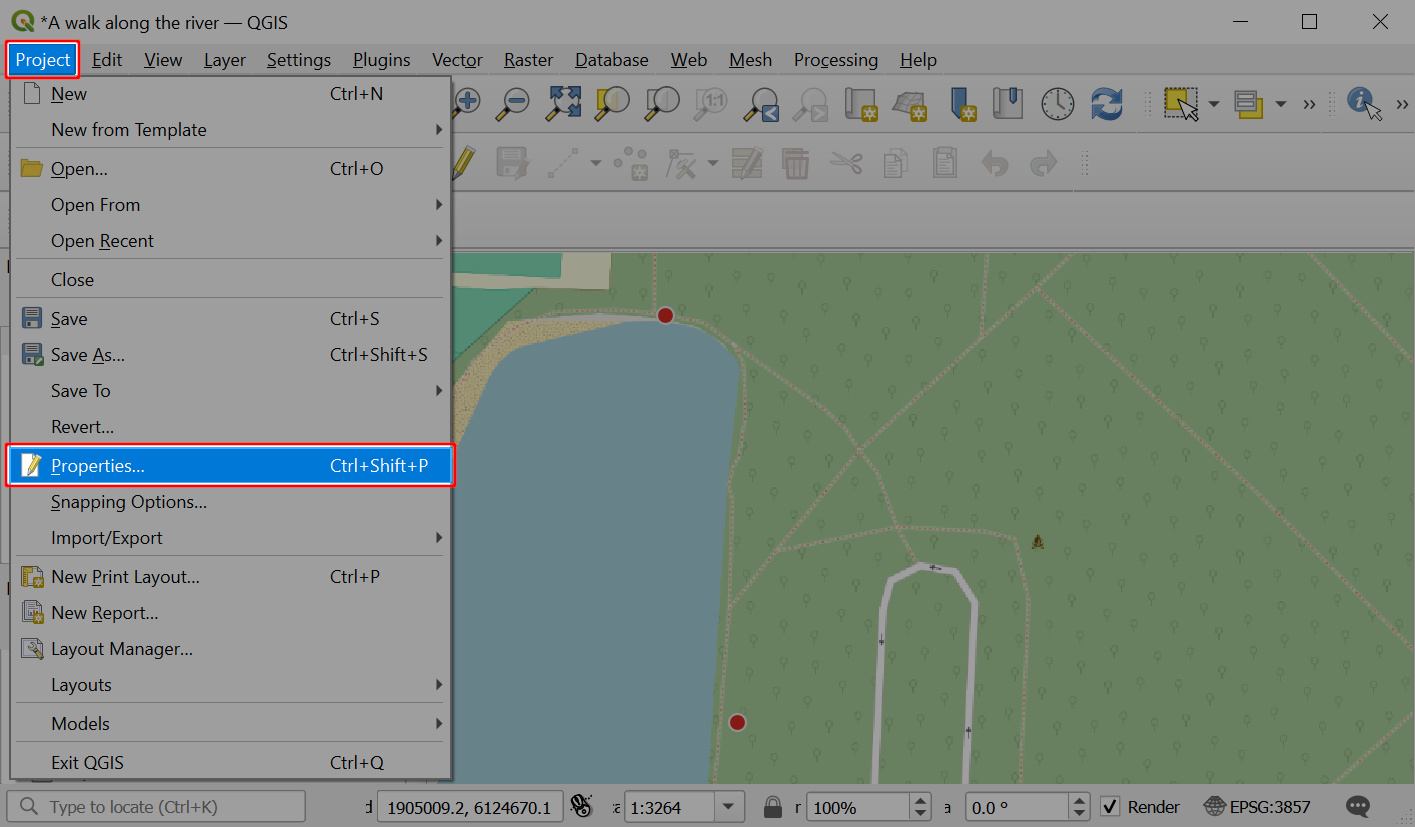
To set the project extent:
Navigate to Project > Properties.
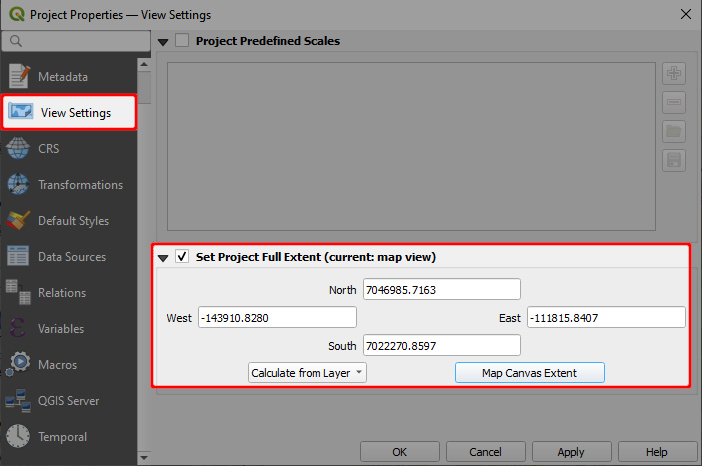
Select View Settings and check the Set Project Full Extent option.
Here, either enter the coordinate extent of your project bounding box or use the map canvas extent. The extent can be also calculated from a layer in your project.
Click Apply to save the changes
Save and synchronise the project to Mergin Maps. Now you can use the Zoom to project option in the mobile app to zoom to the extent you have specified in QGIS.
Photo quality
The quality of photographs and pictures that are saved in the Mergin Maps project can be set up in the Mergin Maps tab in Project properties. When pictures are added using Mergin Maps mobile app (uploaded or taken with the camera), they will be resized accordingly.
By default, the quality is set to Original - the original pictures are stored. If you want to resize the pictures, you can choose from High, Medium, or Low quality. The EXIF metadata of the original files are kept.
Don't forget to save and sync your project!
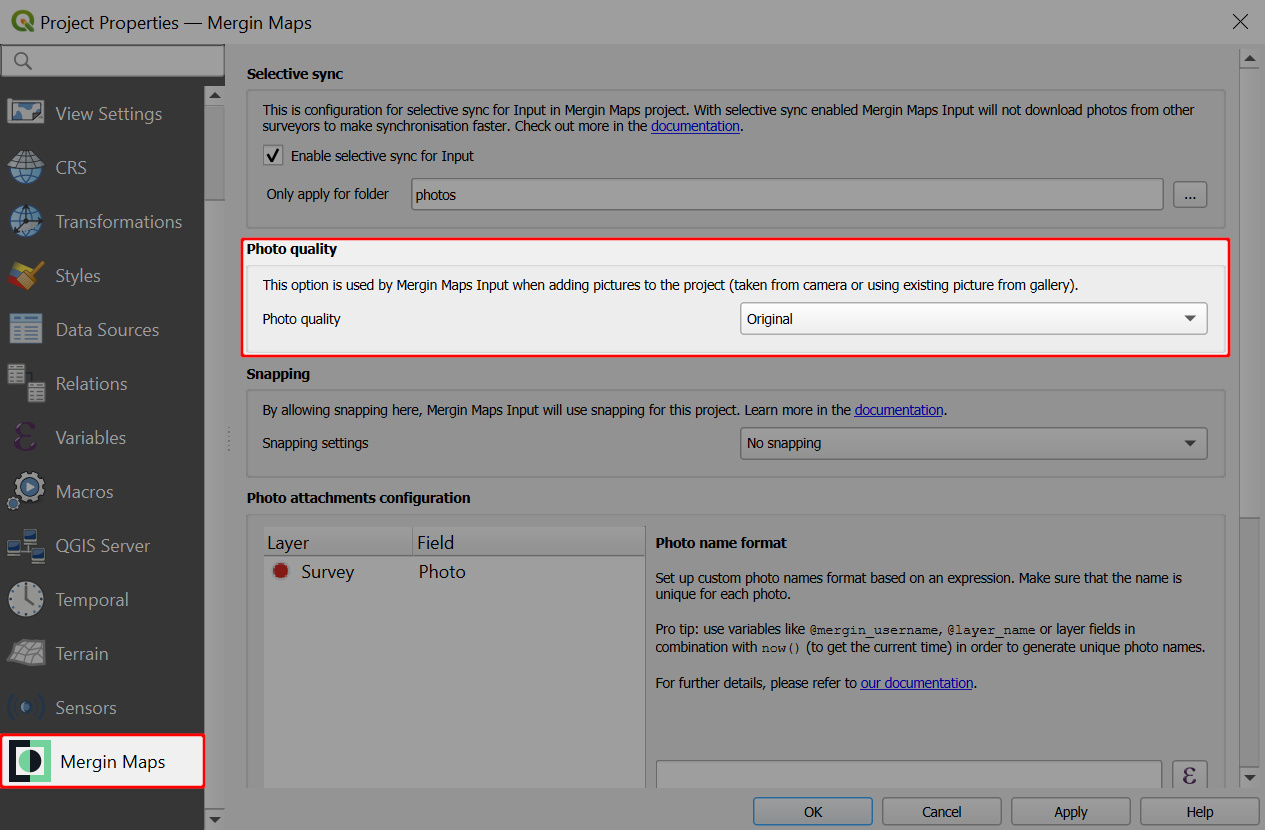
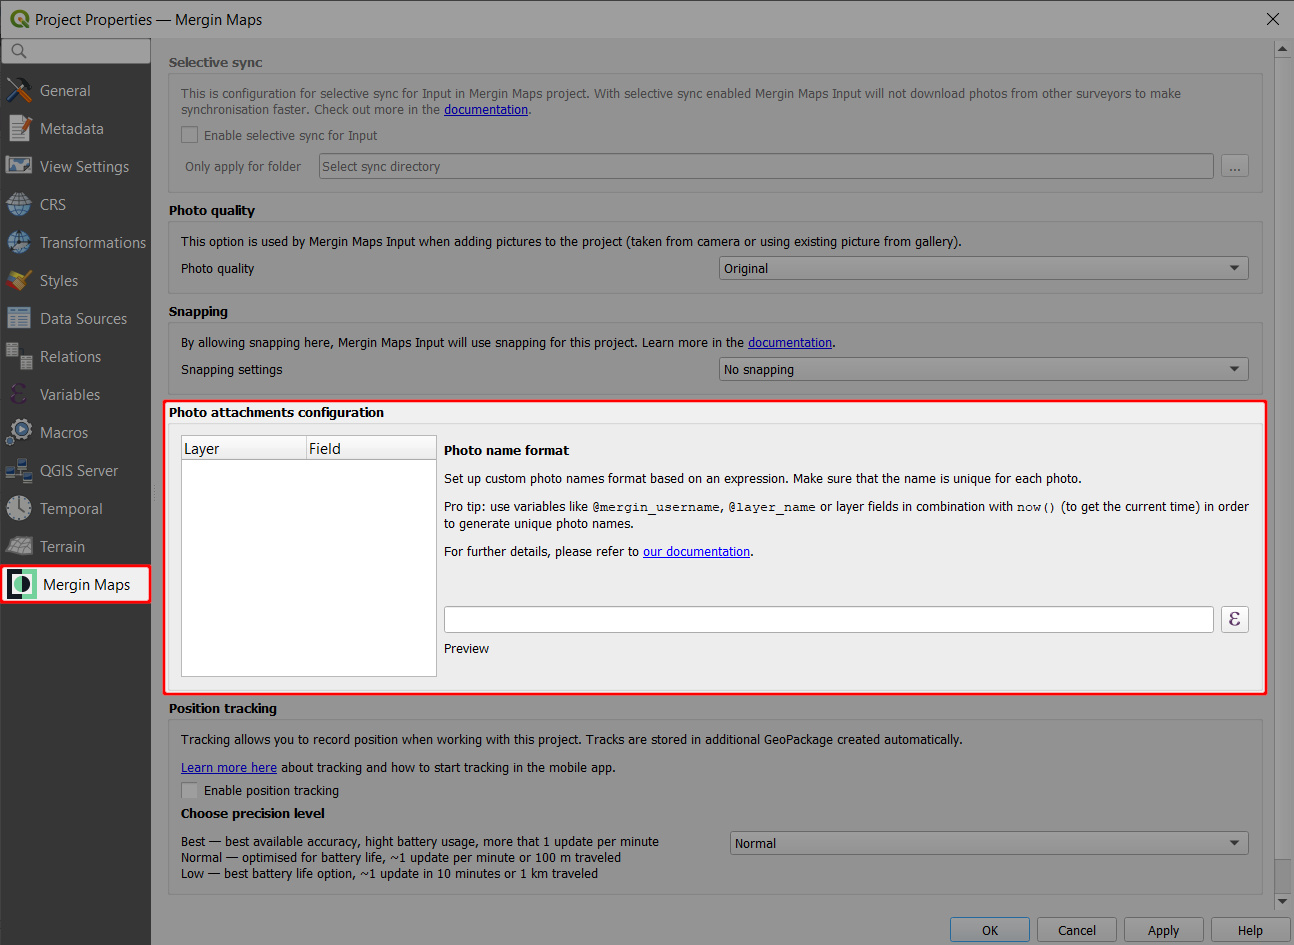
Photo names
Names of the photos that are captured in the field using Mergin Maps mobile app can be customised. The name format can be set in QGIS with Mergin Maps QGIS plugin.
TIP
How to Set Photo Names Format will guide you through the setup and provide examples of expressions that can be used to name your photos.
Snapping
If you want to use snapping in Mergin Maps mobile app during the field survey, you need to set it up in the Mergin Maps tab in Project properties.
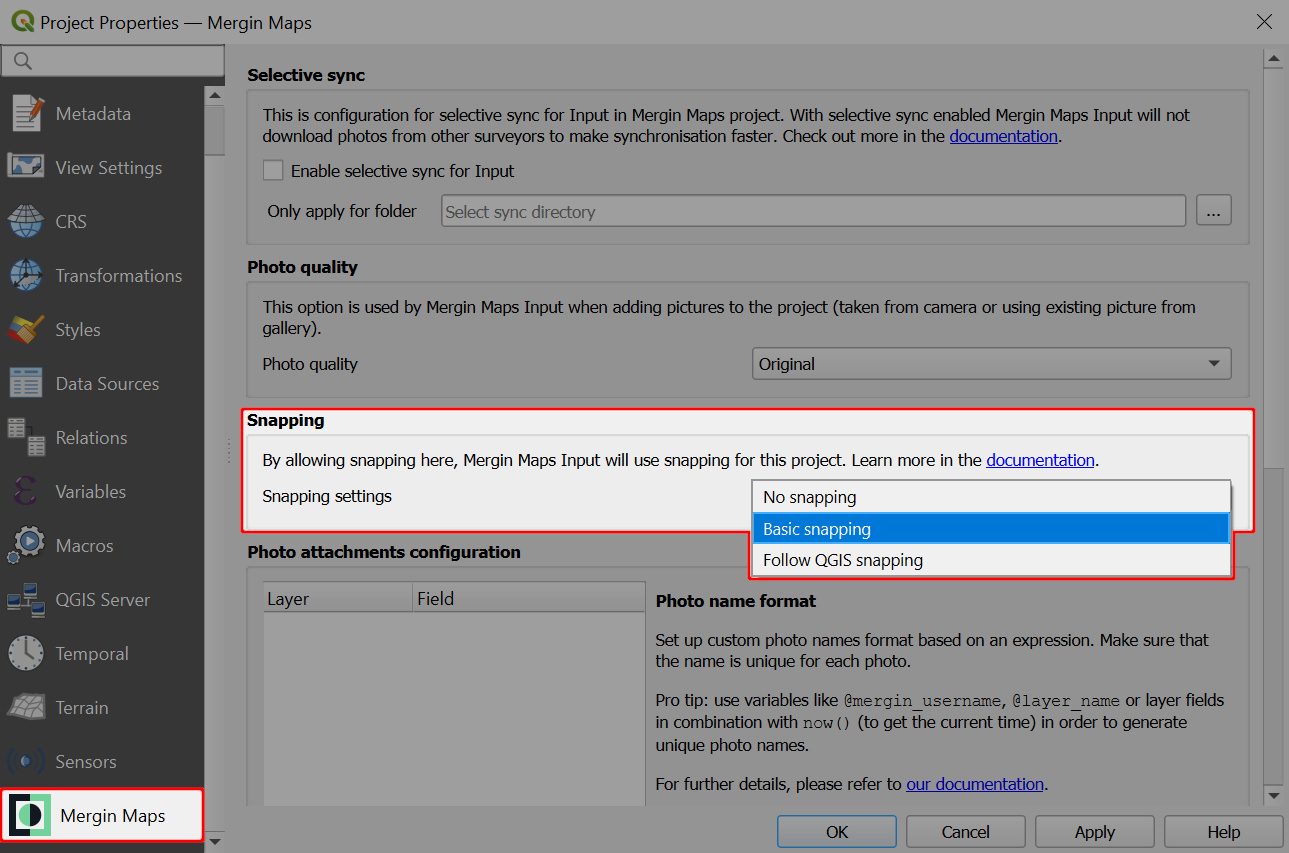
The snapping options are:
- No snapping - snapping is not enabled (default)
- Basic snapping - features are snapped to the vertices and segments of vector features in the project
- Follow QGIS snapping - uses the snapping preferences defined in the Mergin Maps project in QGIS
TIP
How to Set Up Snapping for Mergin Maps mobile app contains detailed steps that may help you with the snapping setup.
Tracking
Tracking your position when doing the field survey with Mergin Maps mobile app can be enabled in the Mergin Maps tab in Project properties.
![]()
You can read more about this functionality in How to Use Tracking in Mergin Maps mobile app.
Map sketching
Map sketching for the mobile app can be enabled in the Mergin Maps tab in Project properties. Here, you can also set the colours that will be available for sketches.
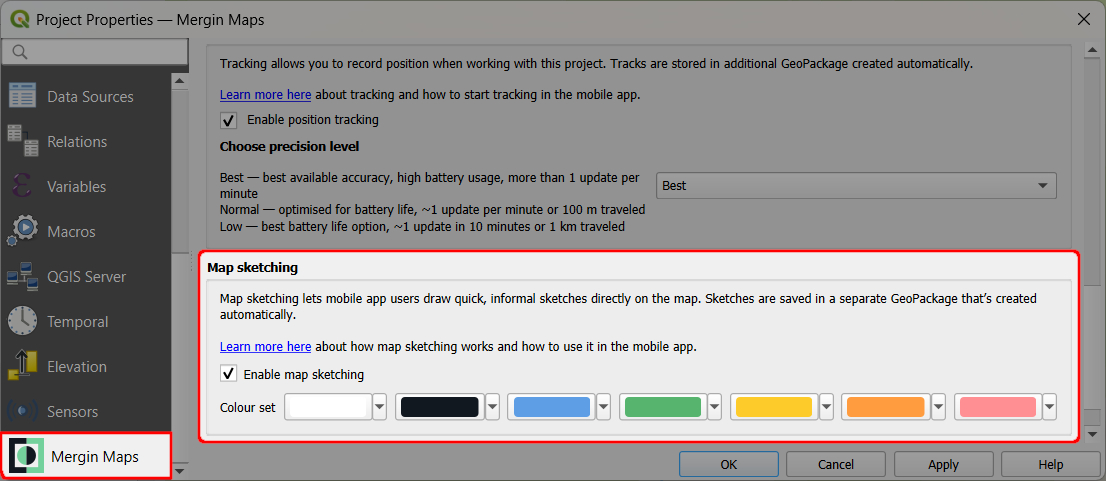
You can read more about this functionality in Map Sketching.
Photo sketching
Photo sketching for the mobile app can be enabled in the Mergin Maps tab in Project properties.
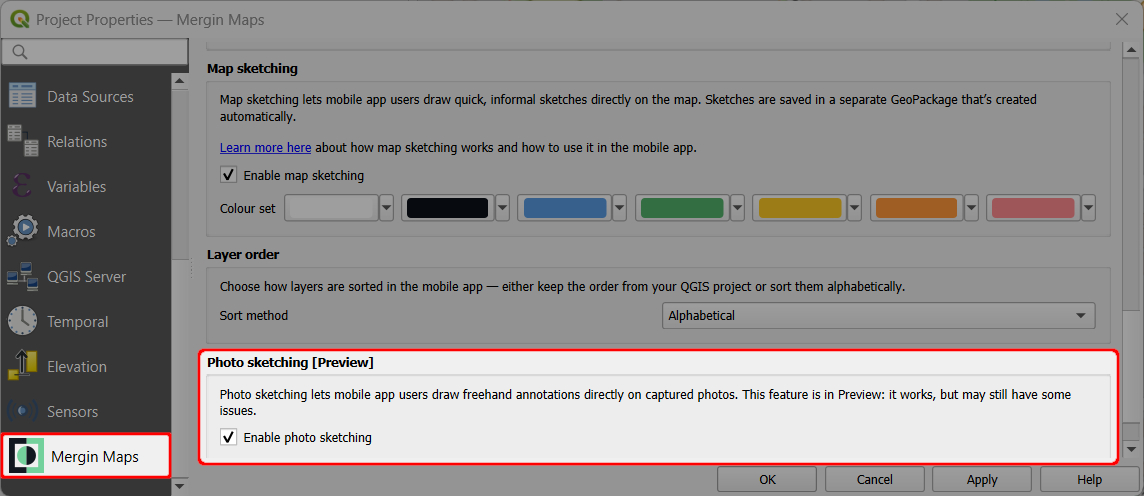
You can find out more about this functionality in Photo Sketching.
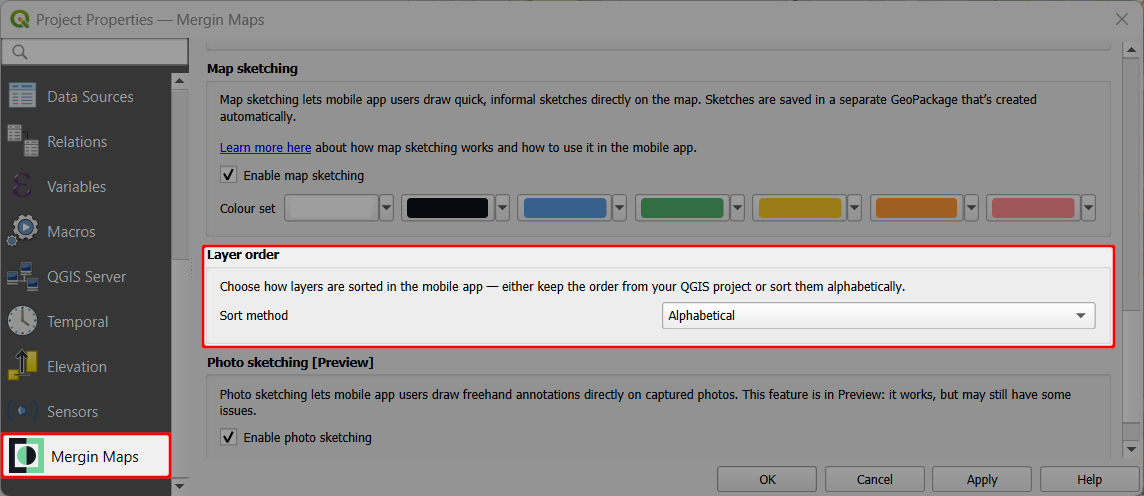
Layer order
There is an option to define the order in which layers are displayed in the mobile app: alphabetical or QGIS layer order. Detailed steps can be found here.
Map themes
Map Themes make possible to switch between different background maps in Mergin Maps mobile app (e.g. cartography maps and aerial imagery)